GPX Logger with Arudino UNO

This is my blog on creating GPX file Logger with Aruduino UNO, Seed Studio SD Card Shield, and Beitian BN-220 GPS/GNSS module.
Recently bought Arduino UNO R3 microcontroller board and Beitian BN-220 GNSS module, and decided to create a device that will create and record a standard .gpx format file so I can use it to either create my routes in Google Earth Pro, or create telemetry in my GoPro videos, like displaying a route map, and displaying elevation, speed and so on.By now the project is almost complete. Just waiting for warmer weather to print the enclosure. The printer is in the garage and I seal it for the winter, and do my printing normally during Summer time only.
The Arduino UNO R3 board I bought from the arduino.cc web store.
Then I also purchased the Seeed Studio SD Card Shield v4.0 from the PiHut.
The shield comes very handy, in particular if we don't want to do any soldering. This is because, together with the SD card reader, it has also two ports, one of which has 4 connections: +5V, GND, RX, TX, which allows us to plug our BN-220, that comes also with the same port, straight into this white port, as can be seen on the picture.
As seen on the same picture, I wanted to extend the BN-220 wires because my idea was to put the module on the top of the car, and the logger itself inside the car to get maximum quality reception.
Because, during normal operation, I would have to insert and remove the SD card to and from the logger, as well as to keep the 12V plugged-in all the time, it would be difficult for me to make the whole logger waterproof.
So the idea was to fully seal the GPS module with silicone, and the logger itself would remain inside the car.
While such idea is good, my later tests showed that this is not really necessary as inside the car, on the dashboard under the windscreen, this GPX Logger is still receiving 12 satellites - maximum number of the satellites that BN-220 is able to receive.
And the same tests also showed that the number of recorded lines inside the .gpx file doesn't increase, independent of whether the module is under the windscreen or on the top of the car.
This logger is designed to write an XML string (line) into the file every second, i.e.:
<trkpt lat="51.21183000" lon="4.51466990"><ele> 5</ele><time>2024-03-01T01:12:30Z</time><sat>12</sat></trkpt>
Apart from the three main components, my logger is also using red and blue leds.
The red led will light up if there is any problem with the SD card, i.e.: card not inserted or broken.
The blue led will be waiting till there is a gps fix, and then, when the date and time as well as latitude and longitude are available, it will give first slightly long blink when it opens the new file with the file name constructed from the received satellite date and time, i.e.:
2-29==19-40.gpx
,
and then the blue led will be giving short blinks every time it is appending the new line to the .gpx file.
The whole GPX file will look like this:
<gpx version="1.1">
<trk>
<name>Route 2-29==19-40.gpx</name>
<trkseg>
<trkpt lat="51.20704700" lon="4.61070440"><ele>21</ele><time>2024-03-01T01:17:29Z</time><sat>12</sat></trkpt>
<trkpt lat="51.20704700" lon="4.61070440"><ele>21</ele><time>2024-03-01T01:17:29Z</time><sat>12</sat></trkpt>
<trkpt lat="51.20704700" lon="4.61070440"><ele>21</ele><time>2024-03-01T01:17:29Z</time><sat>12</sat></trkpt>
<trkpt lat="51.20704700" lon="4.61070440"><ele>21</ele><time>2024-03-01T01:17:29Z</time><sat>12</sat></trkpt>
<trkpt lat="51.20704700" lon="4.61070440"><ele>21</ele><time>2024-03-01T01:17:29Z</time><sat>12</sat></trkpt>
<trkpt lat="51.20704700" lon="4.61070440"><ele>21</ele><time>2024-03-01T01:17:29Z</time><sat>12</sat></trkpt>
. . .
. . .
</trkseg></trk></gpx>
Because my GPS Logger is writing the lines to the file till its power is removed, the problem with it is that it will not append the closing GPX tags, which means that many programs, like Google Earth Pro, will consider the .gpx file invalid.
To solve this problem I could have attached a button, pressing which would append the closing tags, but I decided not to bother with this, and simply to create a small bash (.sh) script that will go through all the .gpx files in the current directory and will append the closing tags.
The tags I'm talking about are:
</trkseg></trk></gpx>
And the whole bash script is as follows:
#!/bin/bash

for a in *.gpx; do
      echo "</trkseg></trk></gpx>" | tee -a $a > /dev/null
	  echo "</trkseg></trk></gpx>" $a
done

read Done
and I save it as "app2gpx.sh".
The above is Linux bash script because on my desktop and laptop I run Arch Linux operating system with Plasma 6.
If you have Windows OS, you would have to port this script to batch, and it will be:
@ECHO OFF

FOR /F "tokens=*" %%a IN (*.gpx) DO (
  ECHO </trkseg></trk></gpx> >> "%%a"
  ECHO </trkseg></trk></gpx> "%%a"
)

PAUSE
The above Windows batch script was ported for me by Google's Gemini AI tool. So if you have Windows,
first test it if it works OK.
The BN-220 GPS module can be configured to use Galileo together with GPS satellites, and with 10 Hz frequency, but the module doesn't have flash memory and therefore the settings will be held in it till its battery will run out of power and then all the settings will go back to factory.
The configuration is possible under Windows with U-Blox's U-Center software, and the process is well described in the article:
How To Optimize GPS Receiver Settings in U-Center To Get More Satellite Locks
Please, note, that you don't have to buy usb to serial adaptor if you have BN-220 and Arduino.
Simply upload empty (New) code to the Arudino, connect BN-220's power to Arduino's 5V, BN-220's Ground to Arduino's GND, BN-220's TX pin to Arduino's pin 0 (RX), and BN-220's RX pin to Arduino's pin 1 (TX), and it will be the same as you would use usb to serial adaptor.
My GPX Logger project uses Arduino's hardware serial (pins 0 and 1), which is more effective than software serial.
The Arduino's pin 0 (RX) connected to BN-220's RX pin.
The Arduino's pin 1 (TX) connected to BN-220's TX pin.
The code uses SdFat - SD card library. It is better than basic SD library as it allows me to use SD cards with exfat file system and also allows file names longer than 11 chars.
The code uses TinyGPSPlus library, which is good for Arduino UNO, but it can do only GPS (USA) satellites, and cannot, at this time, read Galileo satellites.
See the whole Arduino code below. You can copy and paste it into your Arduino IDE, or you can download the .ino file from here: 002-gpslogger-sdfat.ino
// GPS Logger for Arduino UNO R3
//   with Seed Studio SD card Shield
//   and Beitian BN-220 gps module
//   plus red and blue LEDs

#include <TinyGPSPlus.h>
#include <SPI.h>
#include <SdFat.h>

// define GPS object
TinyGPSPlus gps;

// define SD card
SdExFat SD;
ExFile gpxFile;

#define SD_FAT_TYPE 3
#define SPI_SPEED SD_SCK_MHZ(4)
const int8_t DISABLE_CHIP_SELECT = -1;

String fileName = "=";
String gpxLine = "<gpx version=\"1.1\">";

void setup()
{
  pinMode(8, OUTPUT);  // blue led means writing data to SD card
  pinMode(9, OUTPUT);  // red means no or other problem with SD card

  Serial.begin(9600);  // begin serial connection

  delay(5000);

  digitalWrite(8, LOW); // set blue led to off
  digitalWrite(9, LOW); // set red led to off

  // init sd card
  pinMode(10, OUTPUT);  // must be for SD card
  while( !SD.begin(4, SPI_SPEED) )  // pin 4 - SD card pin
  {
    digitalWrite(9, HIGH); // SD problem - loop forever till problem solved
  }
  digitalWrite(9, LOW);    // if SD OK go further
}

void loop()
{
  // first we need to wait for gps fix to get our file name
  //   and start logging

  while( fileName.length() < 15 )
  {
    while( Serial.available() > 0 )
      if( gps.encode(Serial.read()) )

        if( gps.date.isValid() && gps.location.isValid() )  // when we have date time and lat, lon, we can create file
        {
          fileName = gps.date.month(); fileName += "-";
          if( gps.date.day() < 10 ) fileName += "0"; fileName += gps.date.day(); fileName += "==";
        }
        if( gps.time.isValid() )
        {
          if( gps.time.hour() < 10 ) fileName += "0"; fileName += gps.time.hour(); fileName += "-";
          if( gps.time.minute() < 10 ) fileName += "0"; fileName += gps.time.minute(); fileName += ".gpx";
        }
    if( fileName.length() > 14 && fileName[0] != "0" )  // if we have file name, open and start writing
    {
      gpxFile = SD.open(fileName, FILE_WRITE);
      if( gpxFile ) digitalWrite(8, HIGH);
      gpxFile.println(gpxLine);
      gpxFile.print("<trk>\n<name>Route ");
      gpxFile.print(fileName);
      gpxFile.print("</name>\n<trkseg>\n");
      gpxFile.close();
      smartDelay(1000);
      digitalWrite(8, LOW);

      break;
    }
    else fileName = "=";
  }

  // get the dataline and put in correct gpxformat, i.e.:
  // <trkpt lat="51.34528167" lon="1.38436667"><ele>50.500</ele><time>2023-09-27T14:53:04Z</time><sat>10</sat></trkpt>

  if( gps.location.isValid() )
  {
    gpxLine = ("<trkpt lat=\"");
    gpxLine += String(gps.location.lat(), 8);
    gpxLine += ("\" lon=\"");
    gpxLine += String(gps.location.lng(), 8);
  }
  if( gps.altitude.isValid() )
  {
    gpxLine += ("\"><ele>");
    gpxLine += String(gps.altitude.meters(), 0);
    gpxLine += ("</ele><time>");
  }
  if( gps.date.isValid() )
  {
    gpxLine += (gps.date.year());
    gpxLine += ("-");
    if( gps.date.month() < 10 ) gpxLine += ("0"); gpxLine += (gps.date.month()); gpxLine += ("-");
    if( gps.date.day() < 10 ) gpxLine += ("0"); gpxLine += (gps.date.day()); gpxLine += ("T");
  }
  if( gps.time.isValid() )
  {
    if( gps.time.hour() < 10 ) gpxLine += ("0"); gpxLine += (gps.time.hour()); gpxLine += (":");
    if( gps.time.minute() < 10 ) gpxLine += ("0"); gpxLine += (gps.time.minute()); gpxLine += (":");
    if( gps.time.second() < 10 ) gpxLine += ("0"); gpxLine += (gps.time.second()); gpxLine += ("Z");
  }
  if( gps.satellites.isValid() )
  {
    gpxLine += ("</time><sat>");
    gpxLine += String(gps.satellites.value(), DEC);
    gpxLine += ("</sat>");
    gpxLine += ("</trkpt>");
  }

  if( gpxLine.length() > 100 )
  {
    gpxFile = SD.open(fileName, FILE_WRITE);
    if( gpxFile ) digitalWrite(8, HIGH);     // blink blue if writing
    gpxFile.println(gpxLine);
    gpxFile.close();
  }
  digitalWrite(8, LOW);

  smartDelay(1000);
}

// This custom version of delay() ensures that the gps object
// is being "fed".
static void smartDelay(unsigned long ms) {
  unsigned long start = millis();
  do {
    while (Serial.available()) {
      gps.encode(Serial.read());
    }
  } while (millis() - start < ms);
}

// end of file
If you don't have a 3d printer, you can go to pcbway, upload .stl file and they can print it and send it to you. Here is the link to the .stl file:
gpslogger.stl
gpslogger.gcode
To generate a .gcode file we need to flip our .stl part 180 degrees. In the SuperSlicer software this part will look like this:
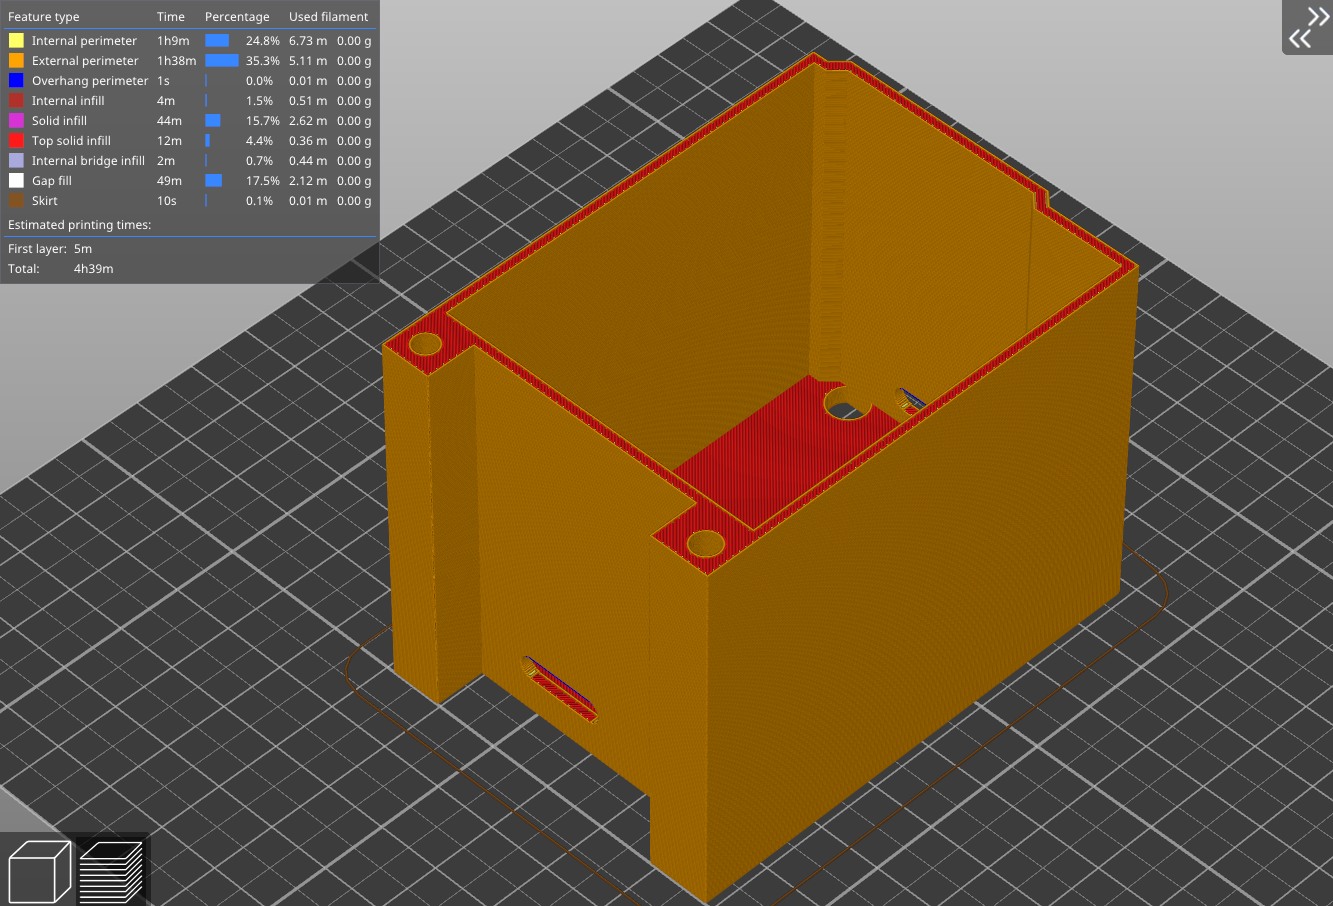 Our enclosure in SuperSlicer
Please leave you questions, suggestions and ideas in the comments section below.